

There are some things that are just worth having in the fridge, and crispy chilli oil has become one of them in my kitchen.
A spoonful can turn eggs, rice, noodles, vegetables or leftover chicken into something that feels completely different. I love recipes like this because they don’t require me to make a whole new meal — they just make the meal I’m already making a little more interesting.
And this crispy chilli oil is ridiculously easy to make — and very addictive. I’m sure crispy chilli oil recipes with 17 ingredients are delicious, but not everyone has the time (or bank account!) for that. I wanted to make this recipe simple, affordable and made with ingredients you can actually find at the supermarket.
LOW EFFORT
SHAREABLE
ADAPTABLE
SOY FREE
LOW STRESS
Why This Crispy Chilli Oil Recipe Works
This crispy chilli oil works because it’s quick, crunchy, flavourful and incredibly easy to use in so many meals.
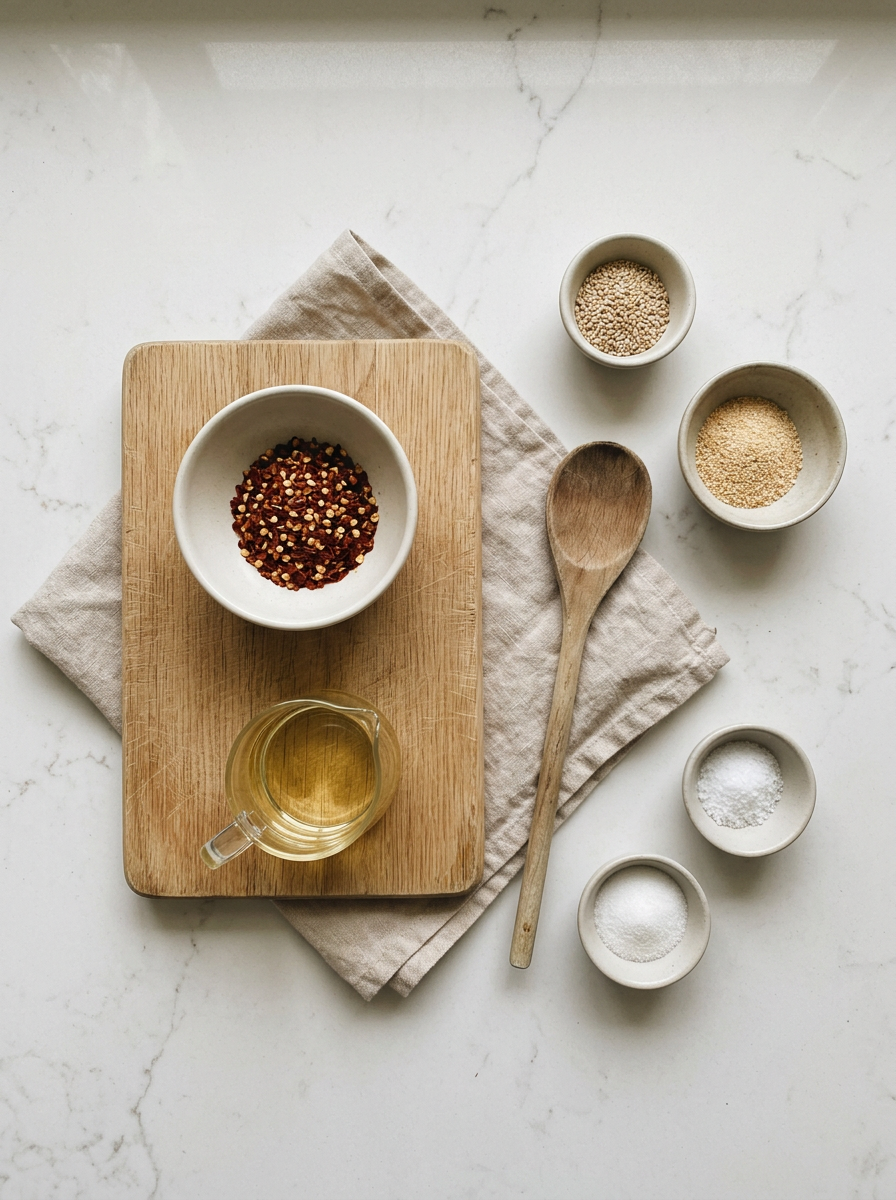
A note about my images: All finished recipe photos, process images and videos are my own. I sometimes use AI-generated ingredient flatlays to illustrate the ingredients used in a recipe, so these may not show an actual arrangement of ingredients. All recipes are developed and tested in my own kitchen.
Ingredients
Here’s everything you need to make this Crispy Chilli Oil at home.
- ½ cup (125 ml) rice bran oil – Rice bran oil has a mild flavour, so it lets the chilli, garlic and sesame be the focus of the finished chilli oil. It also works well for heating before being poured over the dry ingredients. Extra light olive oil, canola oil or another neutral cooking oil can be used instead. I wouldn’t recommend strongly flavoured extra virgin olive oil here because it can change the flavour of the finished chilli oil.
- 2 tbsp dried chilli flakes – These provide both the heat and the crispy chilli pieces that give this recipe its texture. I prefer larger, dry chilli flakes rather than very fine flakes, which can produce a less crispy result. The amount you use on your food will determine how much heat you get in each serving.
- 2 tsp sesame seeds – Sesame seeds add little bursts of crunch and a subtle toasted flavour. They also give the finished chilli oil more texture rather than leaving you with chilli floating in plain oil. Leave them out if you need a sesame-free version.
- 2 tsp dried garlic granules – Dried garlic granules add plenty of garlic flavour without the moisture found in fresh garlic. Fresh garlic can burn when the hot oil is poured over it and also changes the storage considerations for homemade garlic-infused oil. Garlic granules stay dispersed through the oil and become part of the crispy texture.
- ½ tsp salt – A small amount of salt brings out the flavour of the chilli and garlic. It helps balance the recipe so the finished chilli oil doesn’t taste like heat without much depth.
- ½ tsp sugar – Just enough sugar to balance the heat and salt without making the chilli oil sweet. It’s a small amount, but it rounds out the flavour.
- 1 tsp coconut aminos, optional – Adds savoury, umami flavour and a little extra depth. Leave it out if you need a soy-free chilli oil. If you don’t need the recipe to be soy free, tamari or soy sauce can be used instead.
Step-by-Step Instructions
Conventional Method
- Add the dried chilli flakes, sesame seeds and garlic granules to a heatproof jar or bowl.
- Heat the rice bran oil in a small saucepan over medium heat until hot.
- Carefully pour the hot oil over the chilli mixture. It should sizzle as it hits the ingredients.
- Allow the chilli oil to cool before transferring it to a clean jar if needed.
- Store in the refrigerator and use a clean spoon each time.
💡Tip: Drop a sesame seed in the oil to test if it is hot enough. If it swims around like a little tadpole in a pond, it is ready.
The full step-by-step method with exact quantities, timings and instructions is included in the recipe card below.

Flexible Family Cooking Notes
This recipe is designed for real family life — not perfect Pinterest cooking.
Crispy chilli oil is particularly useful when everyone isn’t eating exactly the same thing because you can make one meal and let people add as much or as little chilli oil as they like.
For younger children or anyone who doesn’t enjoy spicy food, simply leave it off their portion.
For adults who like more heat, add extra chilli oil at the table
Tips for Stress-Free Cooking
Keep a jar in the fridge and use it when dinner needs a little help.
It’s particularly handy for:
- plain scrambled or fried eggs
- leftover rice
- noodles
- roast vegetables
- chicken
- simple grain bowls
- avocado toast
- steamed vegetables
You don’t need to create a special meal around it. That’s the whole point.
Pantry Notes
The chilli flakes are the most important ingredient for the finished texture.
If your chilli flakes are very fine, the finished oil may be less crispy. Larger, drier flakes give a better crunchy texture.
You can also adjust the amount of chilli to suit your household. If you’re making it for a family with different spice preferences, start milder and add extra chilli oil to individual portions.
Replace rice bran oil with canola or vegetable oil. If you prefer olive oil, use an extra light one.
Coconut aminos is a soy-free alternative to soy sauce. Use soy sauce or tamari if you desire.
Tools I Use For This Crispy Chilli Oil Recipe
- Small saucepan
- Heatproof jar or bowl
- Spoon
- Clean storage jar with lid
How to Store Crispy Chilli Oil
Allow the chilli oil to cool completely before storing.
Transfer to a clean, airtight jar and refrigerate. Always use a clean spoon when serving.
Because this recipe contains garlic, I prefer to keep it refrigerated rather than storing it at room temperature.
How to Adapt This Crispy Chilli Oil Recipe
These simple swaps make this recipe easier to adapt for allergies, food intolerances, sensory preferences and different dietary needs.
DAIRY FREE
Naturally dairy free.
GLUTEN FREE
Naturally gluten free as written. If adding soy sauce or tamari, choose a certified gluten-free option.
EGG FREE
Naturally egg free.
LOWER CARB
This recipe is low carb as it is.
NIGHTSHADE FREE
Chilli is a nightshade, so this recipe is not suitable. Try a garlic and sesame infused oil without chilli instead.
NUT FREE
No changes are needed.
CORN FREE
Check packaged ingredients.
SOY FREE
Naturally soy free as written.
Flexible cooking doesn’t need to mean cooking separate meals for everyone.
👉 For easy adaptable cooking, learn how to confidently swap everyday ingredients like flour, stock, pasta, soy sauce, and baking staples.
⚠️ The more swaps you make, the more the final result may vary — start simple where possible.


Homemade Crispy Chilli Oil
Ingredients
Method
- Add the dried chilli flakes, sesame seeds, garlic granules, salt and sugar to a heatproof jar or bowl.
- Heat the rice bran oil in a small saucepan over medium heat for 3–4 minutes, until hot but not smoking.
- Carefully pour the hot oil over the chilli mixture. It should sizzle as it hits the ingredients.
- Stir carefully to combine, then add the coconut aminos if using.
- Allow the chilli oil to cool completely before transferring it to a clean, airtight jar if needed.
- Store in the refrigerator and always use a clean spoon when serving.
Notes
Serving Suggestions
Start small: The chilli flakes are spread through the oil, so you get both chilli flavour and heat in every spoonful. Start with about ½–1 teaspoon per serve and add more to taste.
Try this crispy chilli oil with:
- Eggs – Fried, scrambled or poached eggs all work beautifully with a little crispy chilli oil.
- Rice bowls – Add a spoonful to leftover rice with chicken, vegetables or whatever needs using up.
- Avocado toast – Add a little chilli oil to avocado toast when you want something more interesting than plain avocado.
- Sardines on toast – I have this frequently and love the addition of crispy chilli oil.
- Pasta – stir through pasta for a nice kick
More Flexible Family Recipes




Tried This Recipe?
Did your family love it too?
Leave a comment and share what swaps you used — it helps other families more than you think!
Frequently Asked Questions
Real Food For Real Families
These recipes are designed to help you cook one flexible meal that works for everyone — without making multiple dinners.
I focus on simple ingredients, practical swaps and real-life cooking. You won’t find perfectly styled food or complicated techniques here — just balanced, adaptable meals for busy families.
Because food should nourish you — not control you.








Leave a Reply